For any support please don't hesitate to contact us at arifuzzaman.bd.ctg@gmail.com.We provide 13 hours real-time support for our customers.
We would like to thank you for choosing Salinait - Salinait responsive It Solutions & Business Elementor WordPress theme.
Getting started
You need at least WordPress version 6.0 or higher installed for this theme to work properly. We strongly recommend always using the latest stable version of WordPress to ensure better performance, compatibility, bug fixes, and security updates.
PHP version 7.4 or greater. But for maximum speed gain we recommend
you to use PHP version 8.0+.
MySQL version 5.7 or greater OR MariaDB version 10.0 or greater.
After purchasing the Salinait theme from TemplateMonster using your account, go to your Downloads area. You will be able to download either the Installable WordPress Theme only or the Full Theme Package.Which contains the following files:
The contents of the theme package downloaded from Templatemonster
Salinait .zip - An Installable WordPress Theme zip
file. this file you need to upload to WordPress.
Salinat -child.zip - This file contains the basic
child theme that you can use with our theme. Just installing it
won’t hurt and in case you decide to make some changes/extend the
source code of the theme, it will be very helpful because it helps
not to lose your custom changes after updating the parent theme. More on child
themes
Plugins - This folder contains plugins required to
work with our theme.
Sample Data - This folder contains the demo content
file which will help you to import the demo manually.
Documentation - This folder contains what you are
reading now :)
WordPress Installation
Please follow the instructions in the video to see how you can install
WordPress on your
hosting:
Important! If you download the “All Files & Documentation” package from TemplateMonster and try to upload it directly to WordPress, you may receive this error: Theme is missing the style.css stylesheet. This happens because the full package contains multiple files and folders, not just the installable theme.To fix this issue, please unzip the main downloaded archive first and locate the installable theme file (theme-name.zip). Then upload only that file to WordPress.Make sure you are uploading the correct installable theme file, not the full package.
When you are ready to install a theme, you must first upload the theme files
and then
activate the theme itself. The theme files can be uploaded in two ways:
1. Using Theme Uploader
Follow the steps as instructed in the images below:
From the dashboard go to AppearanceThemesAdd New Upload Theme
Click on “Choose File” and select
Salinait .zip
Click on “Install Now”.
Active the Theme
N.B: All plugins must be installed and activated if you want your site
to look exactly like demo.
Appearance → Themes → Add New Click on “Choose File” and select
Salinait .zip and Click on “Install Now”.
Active Salinait Theme
2. Using FTP Clients
Follow the steps below to upload and install the theme manually using an FTP client such as FileZilla:
Extract the main theme package downloaded from TemplateMonster.
Open your FTP client (for example, FileZilla) and connect to your hosting server.
Navigate to the /wp-content/themes/ directory inside your WordPress installation.
Upload the Salinait theme folder to the themes directory.
After the upload is complete, log in to your WP Admin Dashboard and open the AppearanceThemes menu
You will now see Salinait Theme listed among the
other themes. Click on Activate and you’re done!
3. Updating Theme
Occationally we provide updates which includes new features and bugfixes.
Updating WordPress theme is standard WordPress functionality.
Before Updating Theme:
** Before updating please make sure to keep a
backup of your installed theme and plugins (eg. Salinait Core) to be on
safe side.
There are few ways to update WordPress theme. You can follow any
of the methods described below:
Method 1: By Uploading zip File
From WordPress Admin Panel, Navigate to Appearance -> Themes.
Activate any other theme (eg. Twenty Seventeen) than the current
one.
Delete Salinait Theme.
Now you have to upload the updated theme zip file. To do this,
Navigate to Appearance -> Themes -> Add New -> Upload. Go to
browse, and select the zipped theme folder. Hit "Install Now" and
the theme will be uploaded and installed.
Method 2: By FTP
Using your FTP client, navigate to "/wp-content/themes/" folder on
your server and delete the "Salinait " folder from there.
Now upload the latest non-zipped theme folder into that
"/wp-content/themes/" folder .
After Updating Theme:
** After updating the theme please update all
plugins which come with the theme.
4. Installing required plugins
Salinait theme requires a set of core and additional plugins to function
correctly. A plugin is an additional component that offers functionality and
features beyond a typical WordPress installation. Without them, most of its
functionality is not available. After installing the theme you will be
prompted to install the required plugins at the top of your dashboard.
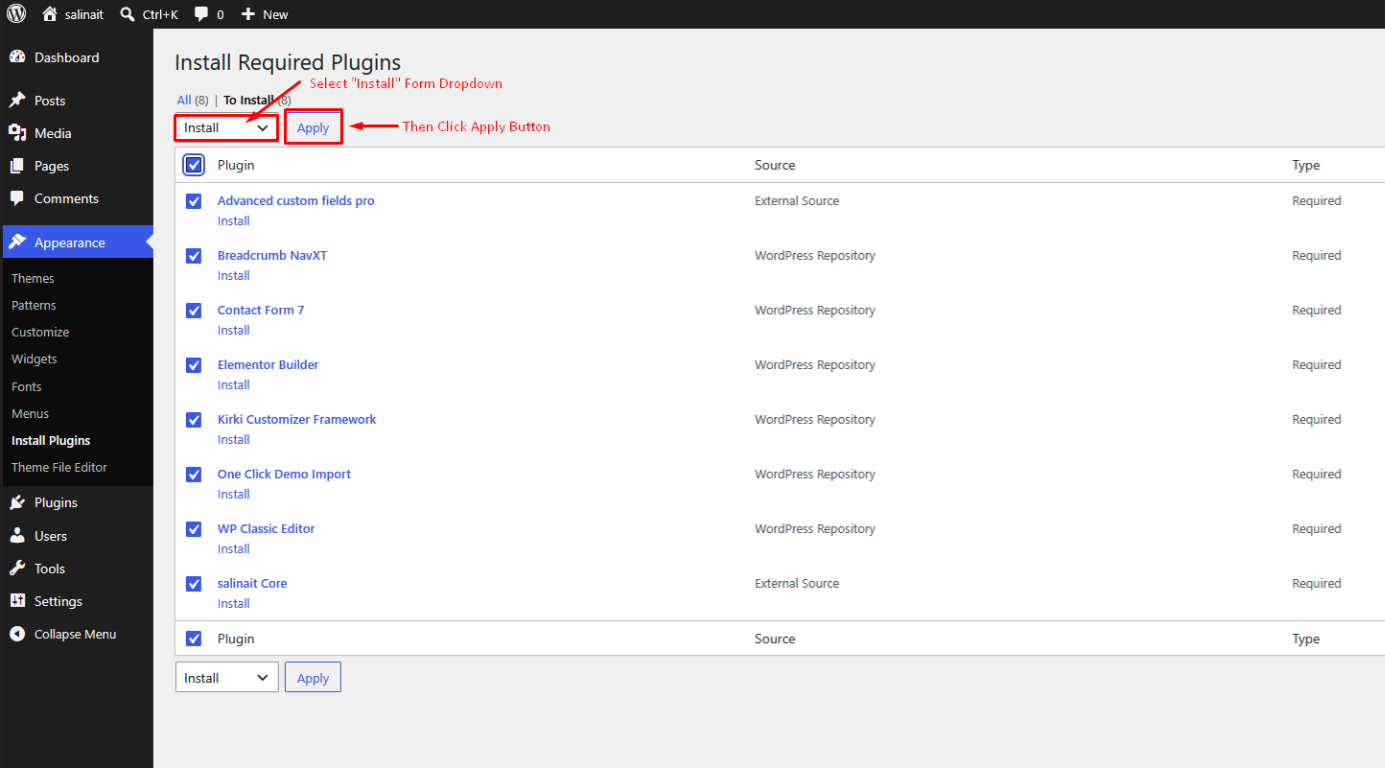
From the dashboard go to Appearance Install Plugins
Toggle all the required plugins and hint “Install”;
The last step will be activating the plugins.
Click on the begin installing plugins link
to install all the required plugins.
Select all and installSelect all and Activate
Importing Demo Contents
We are providing you two methods for importing demo contents: Automatic and
Alternative. You can follow either one of these methods.
One Click Method (Recommended): This method will remove all your
existing data, so use this method only in fresh website. This procedure
will be faster because you just have to do one click and then everything
will happen automatically. If you want an exact clone of demo website
without doing any manual configuration after importing data then this
method is appropiate for you.
Manually Import: Use this method only if:
Automatic demo import method fails ( Only few of our customers
like 5% have experienced this issue due to their hosting limits,
in that case we also provide free demo importing service if you
contact with us).
You already have a working website with existing contents(eg.
posts, pages etc).
1. One Click Method
Want to build your site like the demo? You can do it by only one click!
Note: Please remember that when you are done with
the demo import, your some existing settings will be replaced by the
demo contents Like: Your menu, Customizer. So it is recommended that
you should only do this in fresh site.
Ensure, that the One-Click Import plugin is
installed and activated;
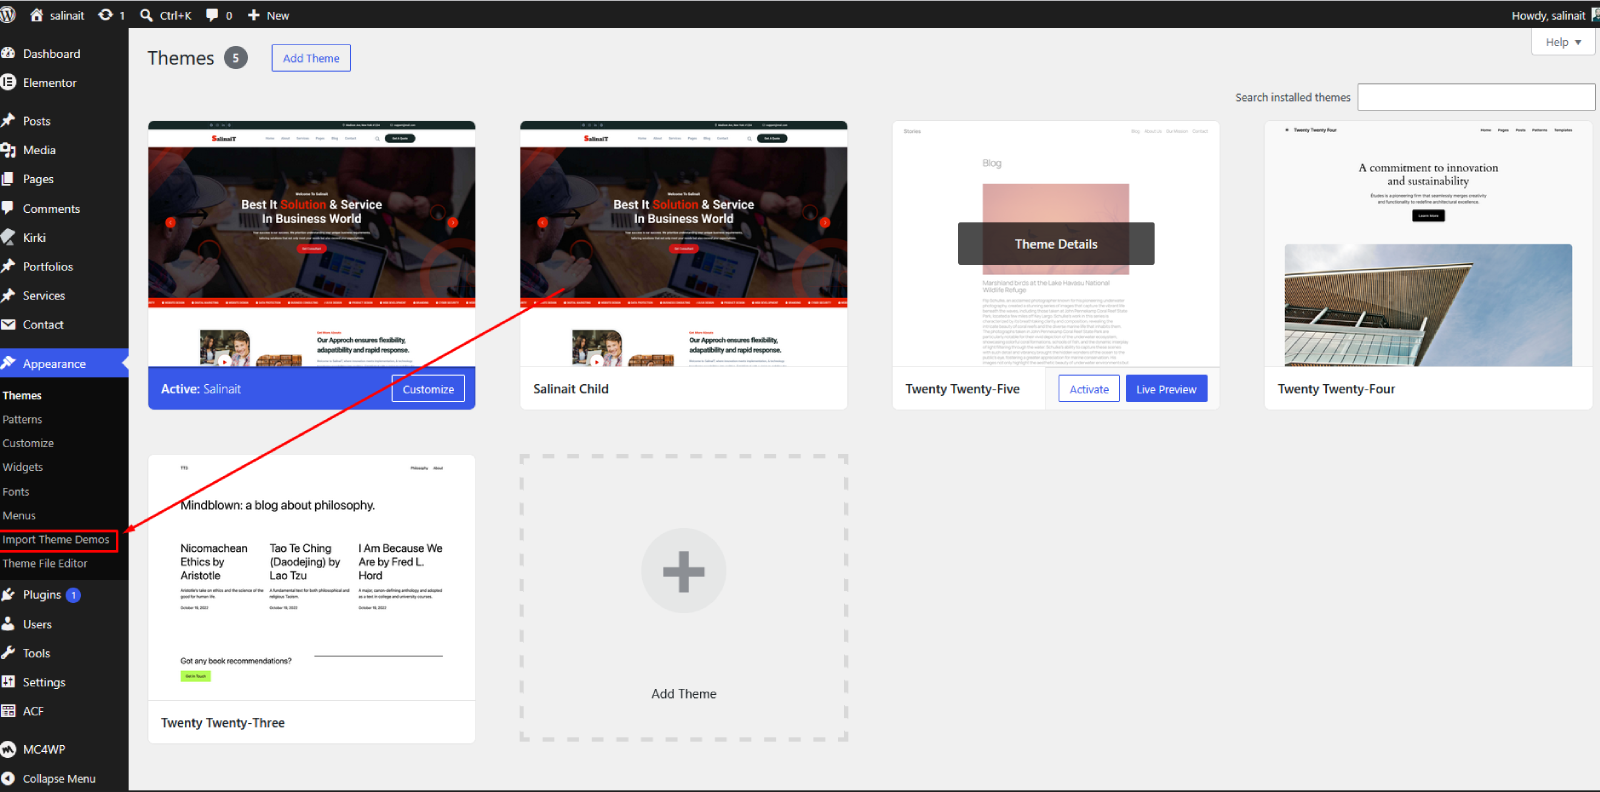
From the dashboard go to Appearance Import Demo Data
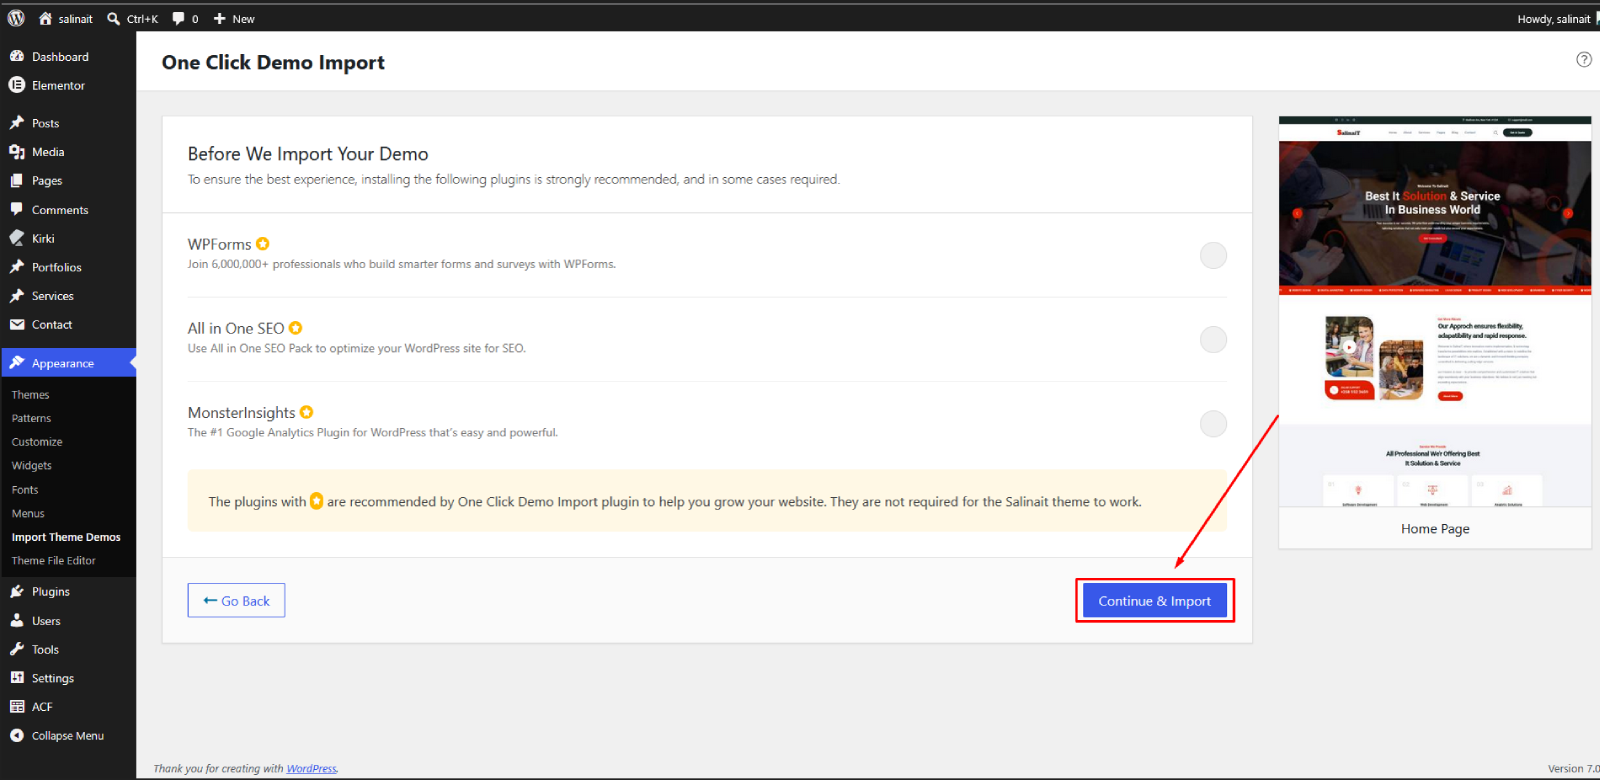
Choose the demo you want to install and click on the
“Import” button below;
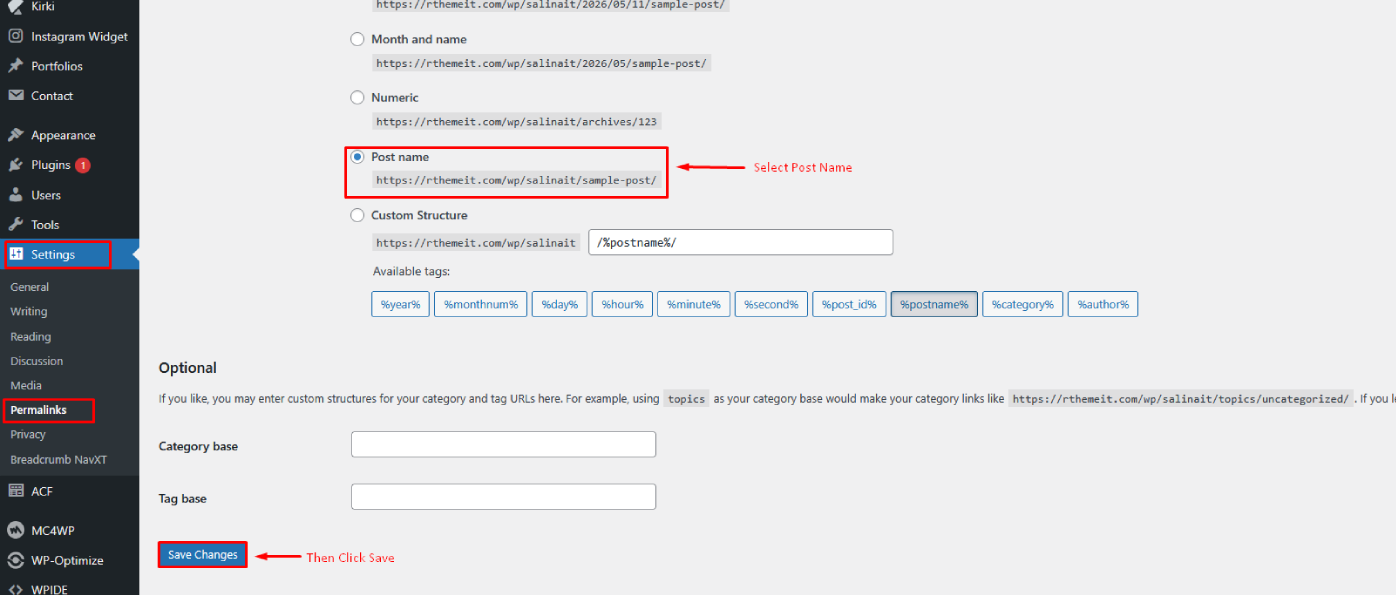
And change the permalink: From the dashboard go to
Settings
Permalink
go to Appearance -> Import Demo Data
Click on the "Import" buttonClick "Yes, Import" ButtonImport Complete! Congrats,
your demo was imported successfully. You can now begin editing your
site.
Change permalink
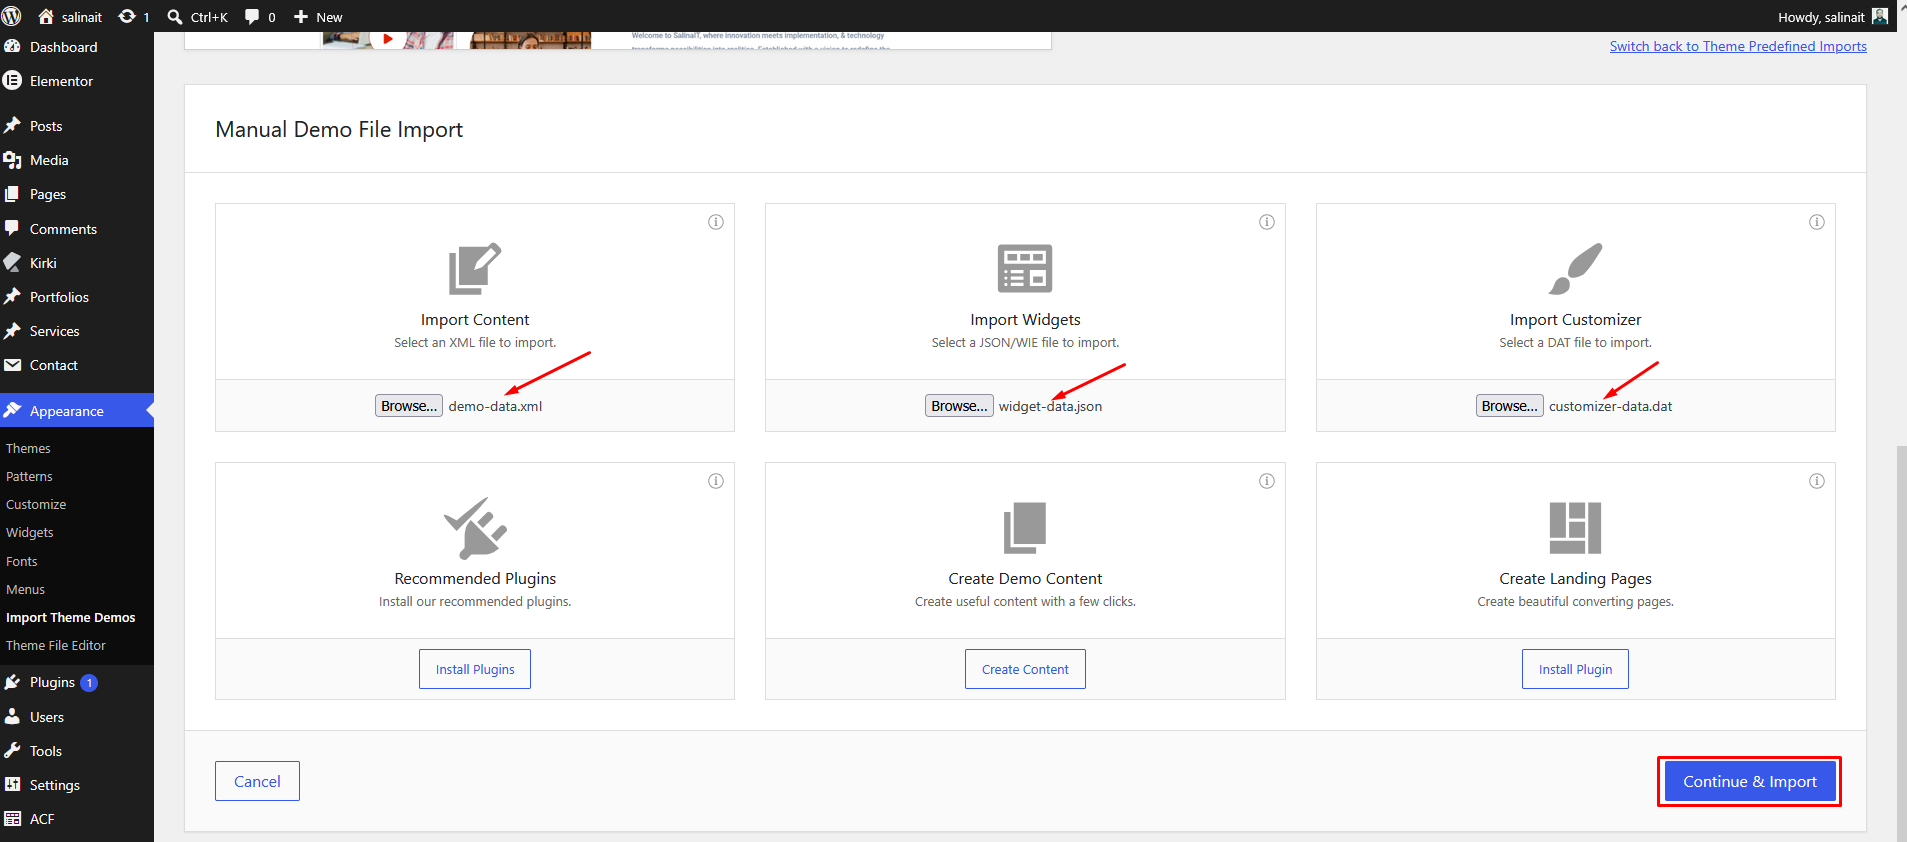
2. Manual Import
Please follow the instructions below:
Click switch to manual import from right corner.
Choose contents-demo.xml file for all content
import
Choose widget-settings.json file for widget import
Choose customizer-data.dat file for customizer
import
and last click Import demo data button
Note: We have added all the above files to the
Theme package -> Demo Data folder.
Click "switch to manual import" link
Choose all file and click the "import demo
data" button
Basic Site Setting
Customize Menu
To customize the menu and megamenu please login to wp-admin and navigate to
Dashboard
AppearanceMenus and follow the following
steps:
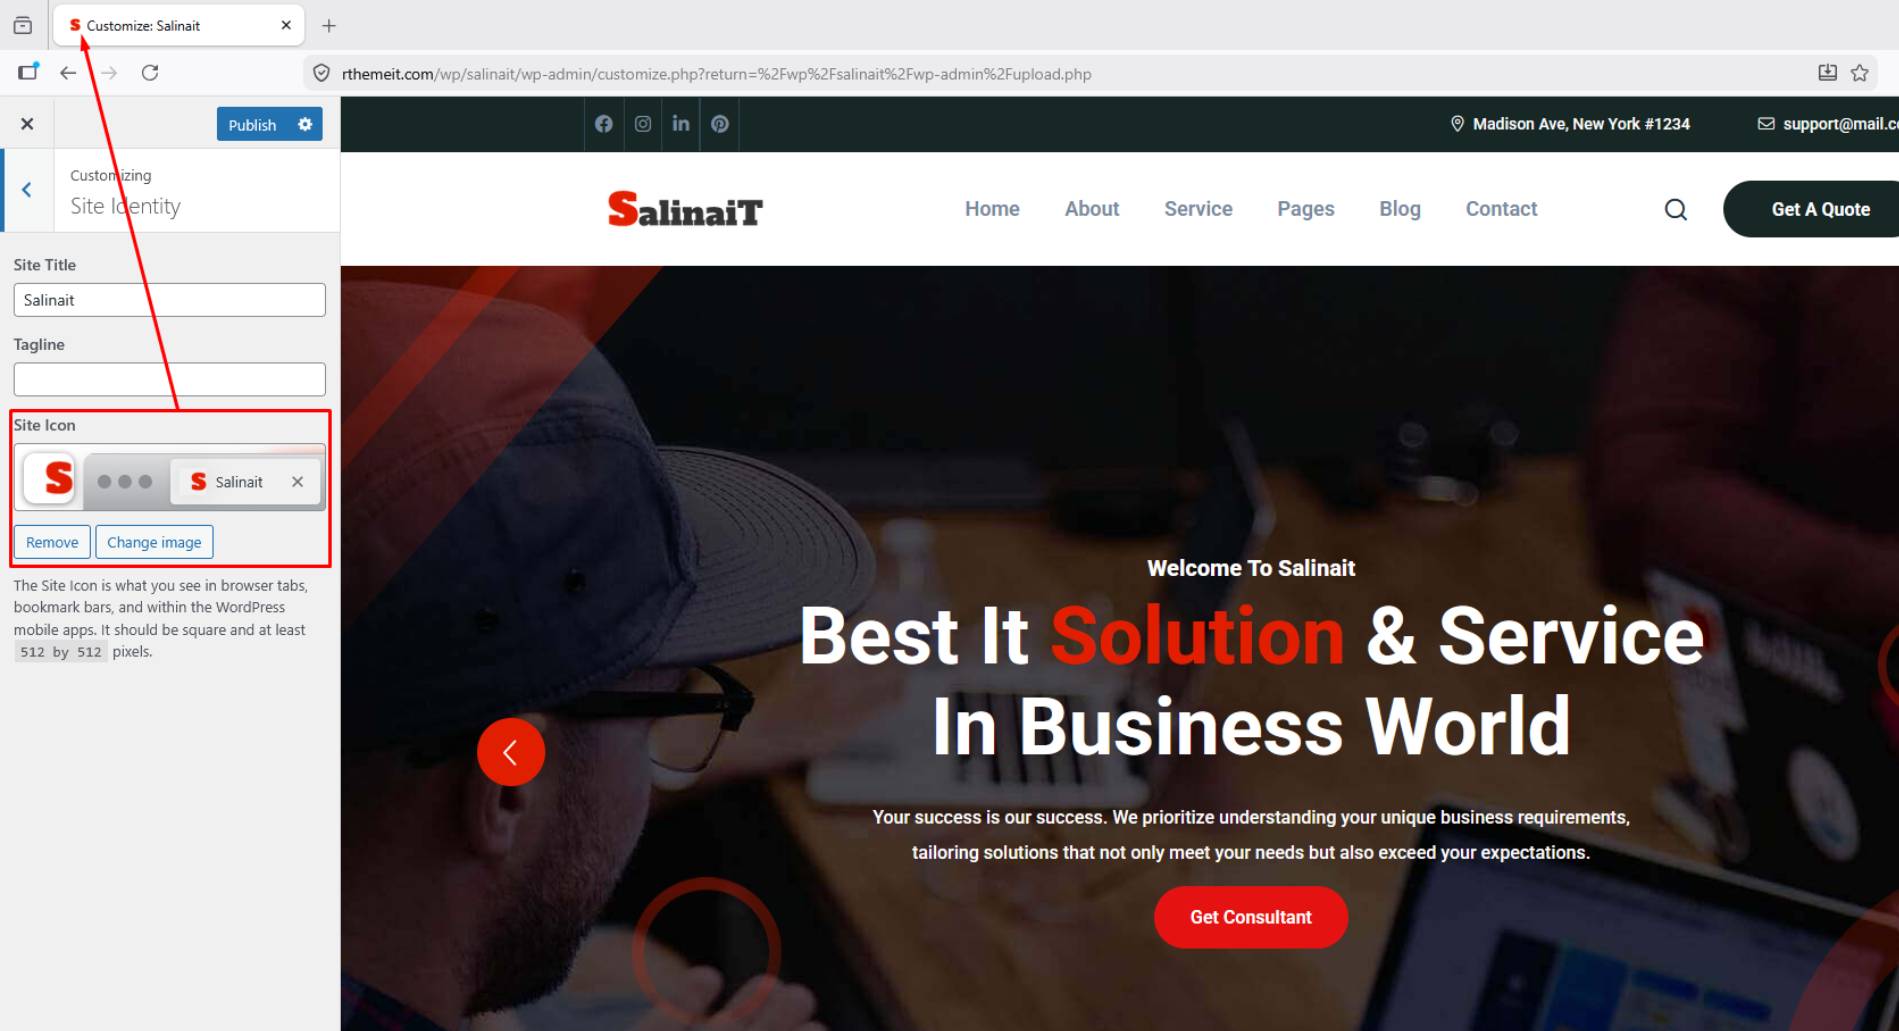
Change Site Title and Favicon Basic Site Setting
To change your Site title and Favicon login to wp-admin and navigate to Dashboard
AppearanceCustomizeSite Identity and follow the
following steps:
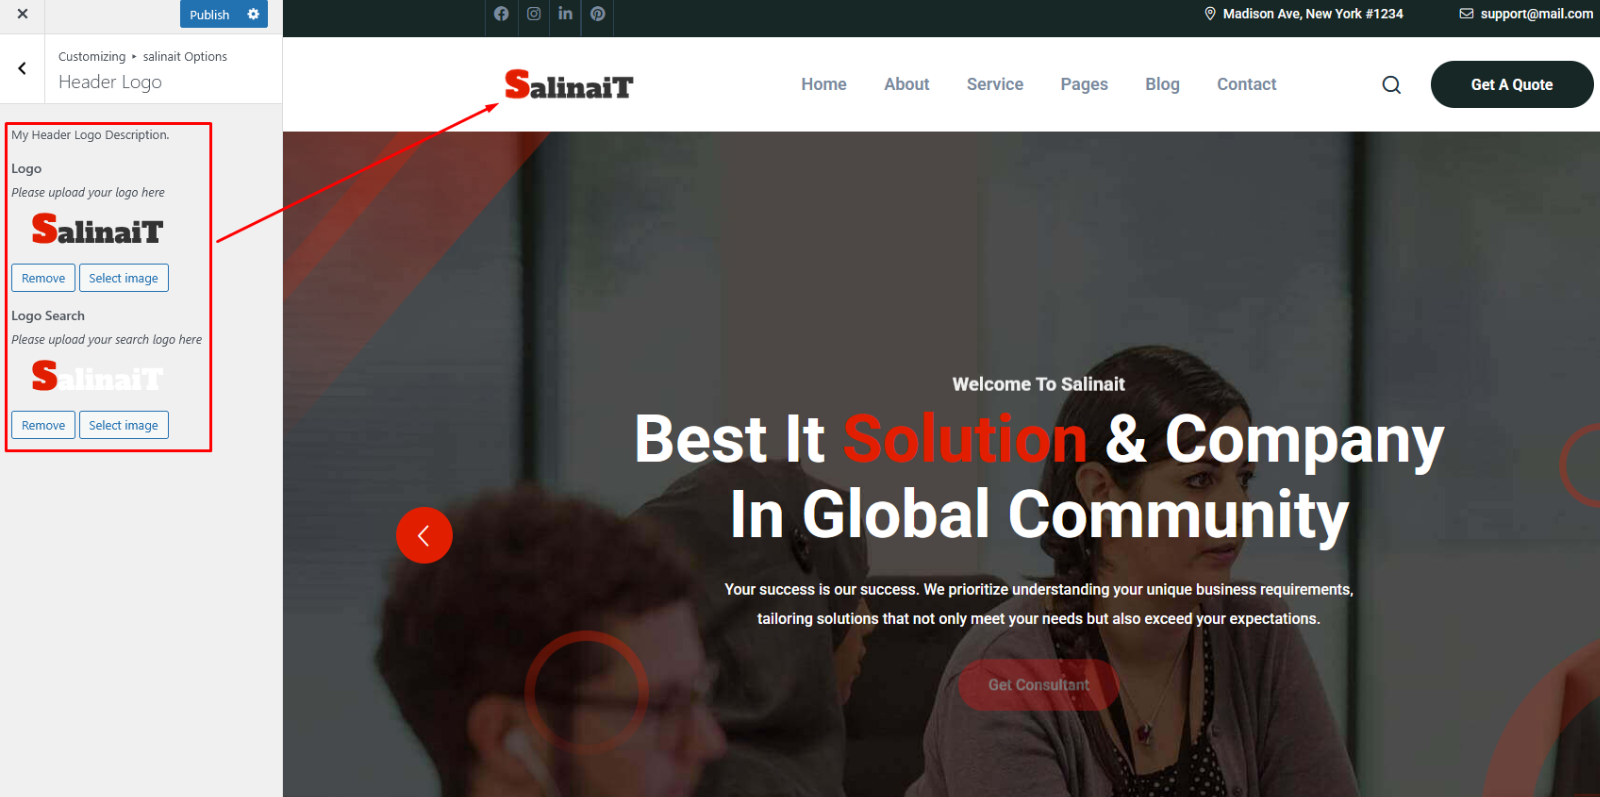
Change Logo
To change the site logo login to your wp-admin and navigate to
Dashboard AppearanceCustomizeSalinait CustomizerHeader
and follow the following steps:
Set Home and Blog Page
To set the home and blog page, login to wp-admin and go to
Dashboard Settings Reading and follow the following steps:
Theme Options
Header
To change Theme Options header navigate to
Dashboard AppearanceCustomizeSalinait CustomizerHeader
and follow the following steps:
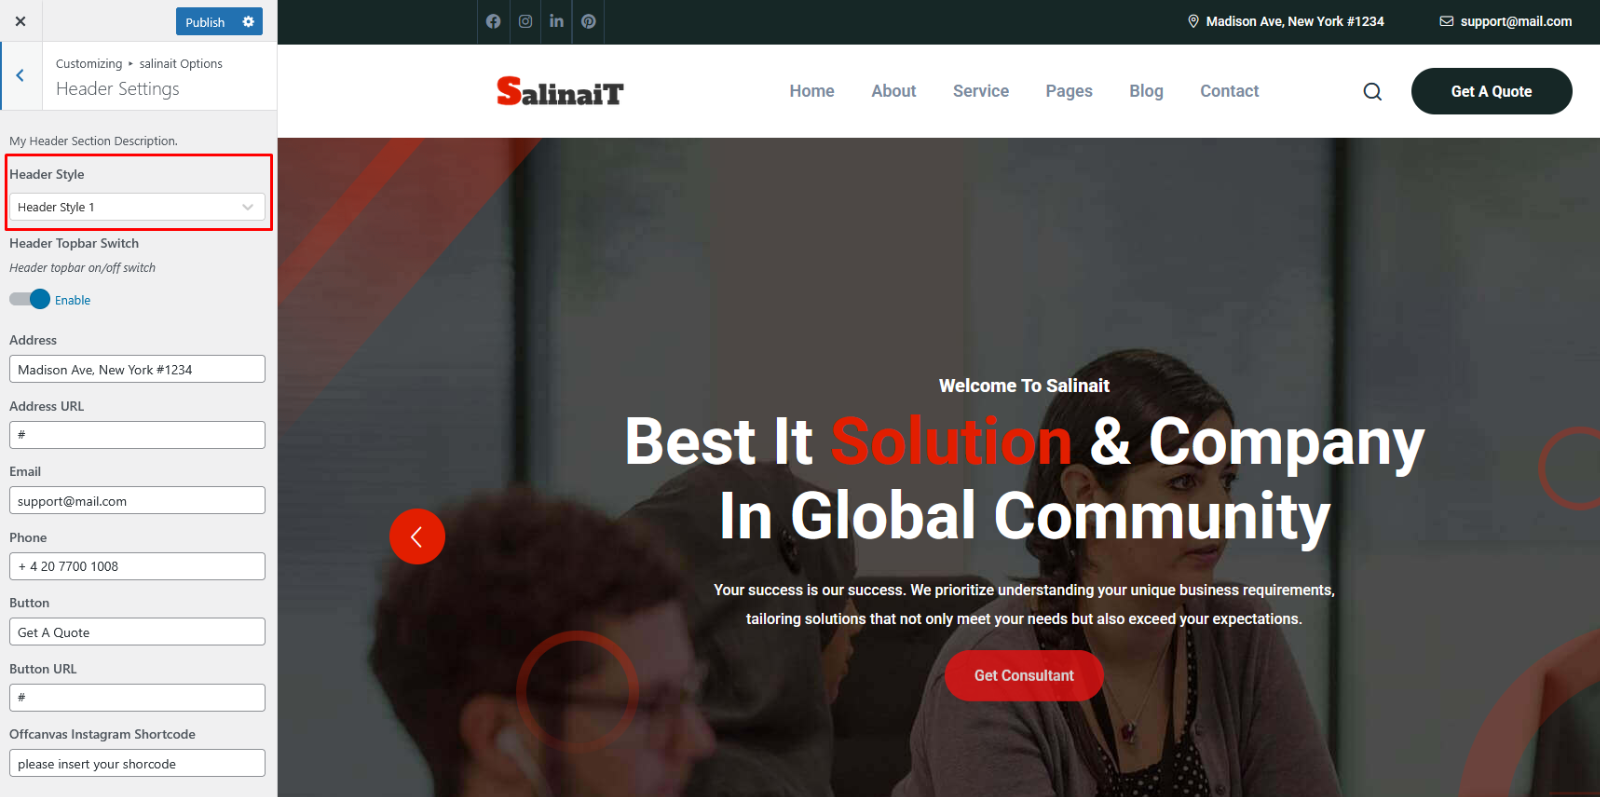
Header / Header layout
To change Theme Options navigate to
Dashboard AppearanceCustomizeSalinait CustomizerHeader
and follow the following steps:
Header Side Info
To change Theme Options navigate to
Dashboard AppearanceCustomizeSalinait CustomizerSide Info
and follow the following steps:
Footer Layout
To change Theme Options navigate to
Dashboard AppearanceCustomizeSalinait CustomizerFooter
and follow the following steps:
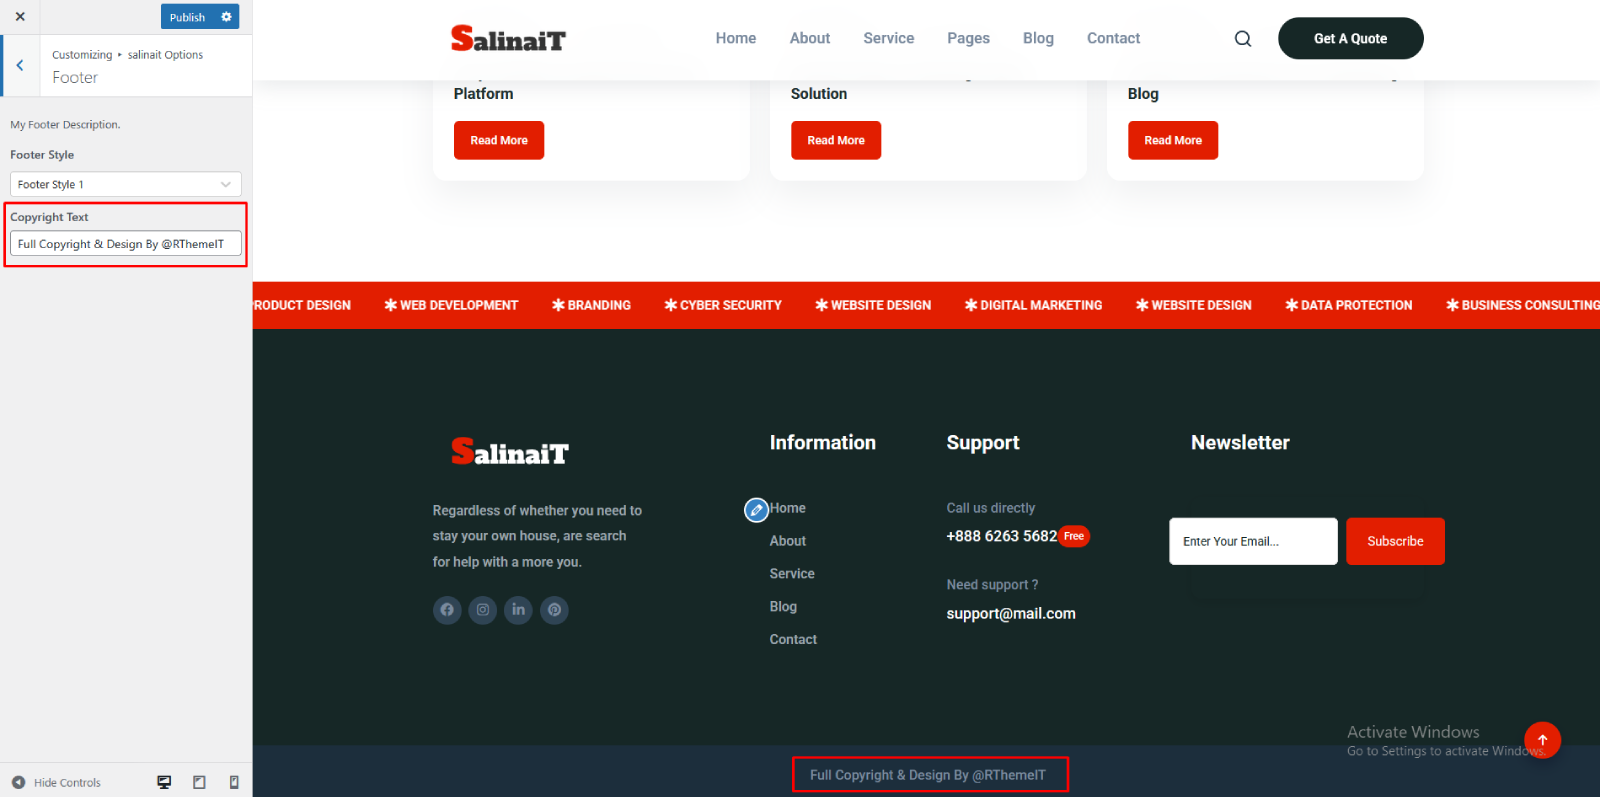
Footer & Footer Copyright Info
To change Theme Options navigate to
Dashboard AppearanceCustomizeSalinait CustomizerFooter
and follow the following steps:
Portfolio Post
Creating a Portfolio
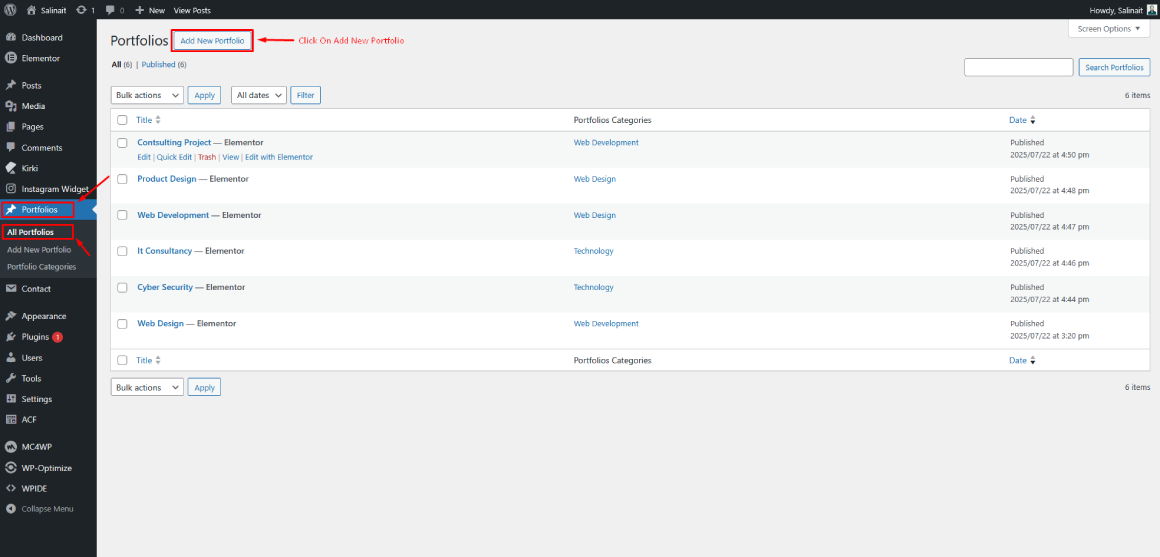
To create a new project do the following:
From the dashboard go to Portfolio All ItemsAdd New
Add project meta and click the publish button
Then click the "Edit with Elementor" Button
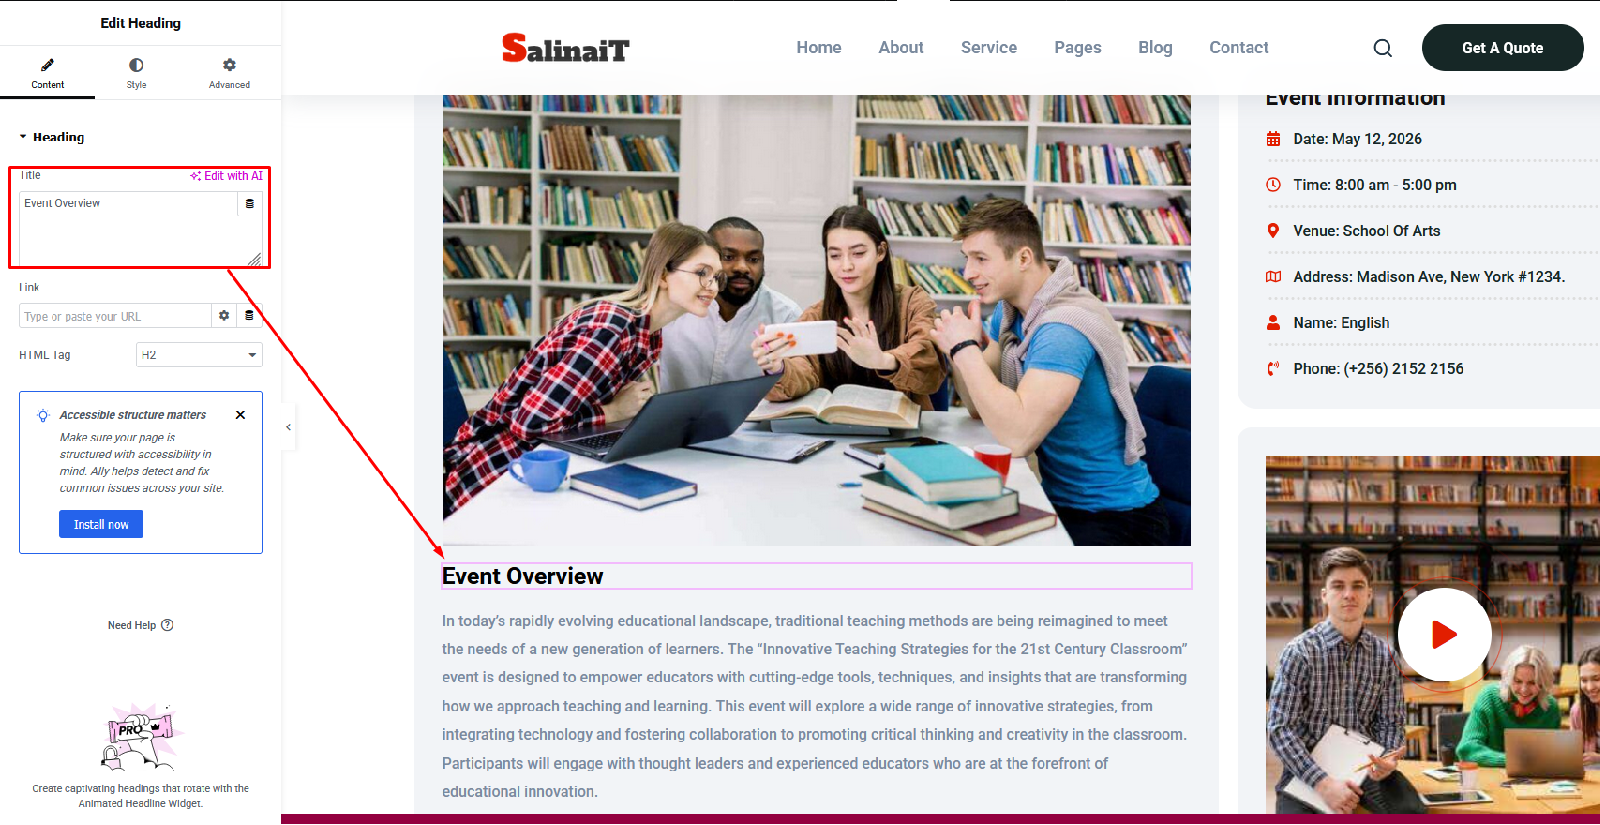
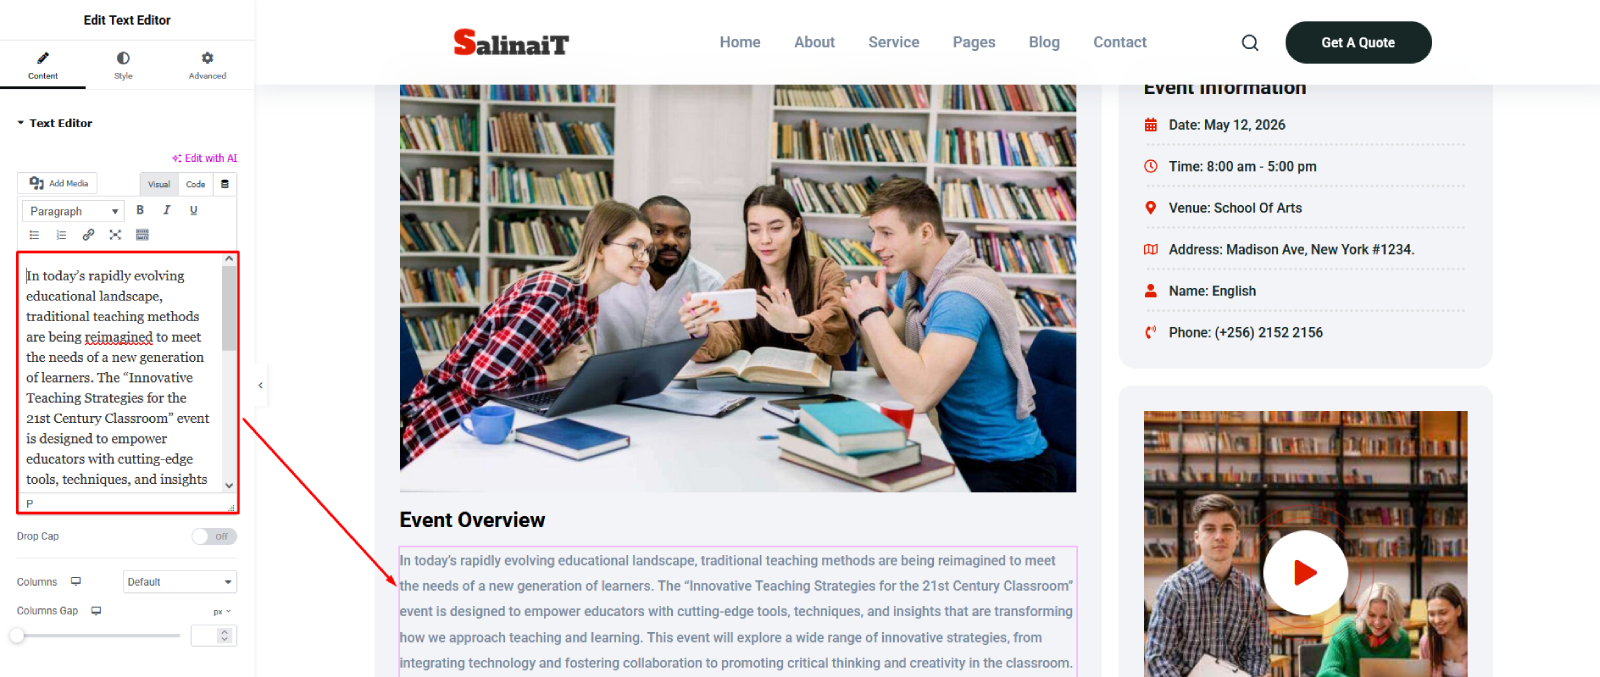
Add project content
Create a portfolioAdd project title and text content
Add project imageAdd project text
Portfolio Page
To create a page with a portfolio template and add it to your website:
From the dashboard go to Pages Add New
Enter your portfolio page title
If you want to overwrite global options. Like
Header, Footer etc style. Please customize here.
Click the Publish Button
Select "Elementor Full Wdth" Page Template
Add a section with "full width" and "No
Gap"
Choose and drop a Portfolio Projects element from the left side
Create a portfolio page
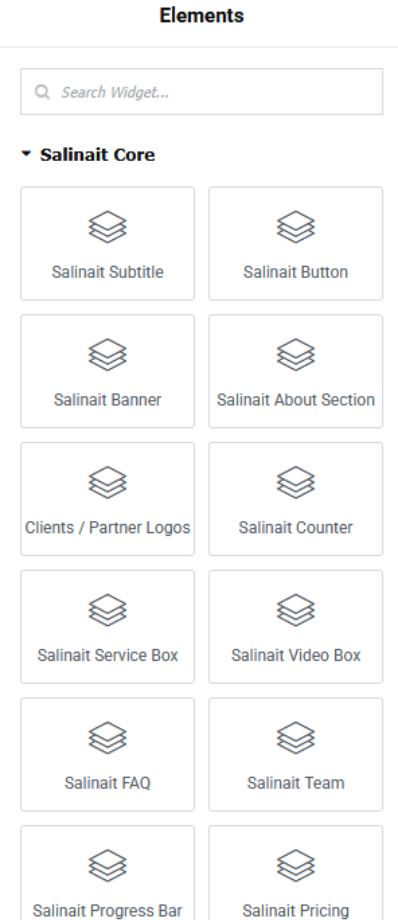
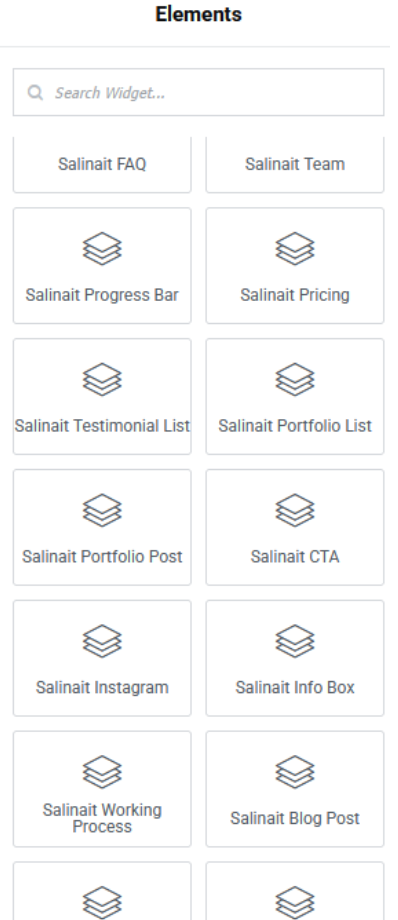
Elementor Widgets
Elementor Page Builder has a lot of built-in widgets by default. But for your
convenience we've created several custom Elementor Widgets that you can use
in your website and extend website functionality. You can find them under
Salinait Core section on Elementor edit mode.
404 Error in all pages
If you face this type of issue, please update your permalink. To update
permalink, navigate to Settings -> Permalink and then click on
Save Settings button.
17. Contact
If you face any issue please contact us at arifuzzaman.bd.ctg@gmail.com. We provide 15 hours real-time support for our customers.